Why? It grows me quickly, forces me to learn what I don’t know and ask for help sooner rather than later, and ultimately results in better outcomes for my teams
To demonstrate this, here are six excerpts! Each one comes with photos, and the first and last ones are the longest. If you only have time to read a few sentences, skip down to stories 2, 3 or 5…

One
Our service design studio’s mid-point project review turned into a hands-on workshop, complete with our handmade version of a card game meant to inspire designers to think outside the box about who they were designing for. Here’s why.
We were initially tasked with designing queueing interventions for the Art Institute of Chicago, but my service design studio took a step back, looking at the huge range of different types of folks walking through the AIC doors each day…
Folks from Chicago neighborhoods who get to visit every season, and visitors from abroad cramming the museum’s most iconic exhibits into a packed itinerary alike. Energetic third graders visiting on a school field trip, homeschooling parents with kids studying totally different periods of history (and with equally varying attention spans), young couples on a date, elderly folks wanting to be around the hustle and bustle while enjoying tea at the cafe, and aspiring teenage artists.
We wanted to consider how their visitor’s guide and museum resources welcomed all of these types of visitors, and how that experience could be improved given that change in perspective.
For this share-out, we decided to create and collaborate with them on a 2 minute prototyping challenge—an exercise our professor had introduced to us (shoutout to Professor Amy O’Keefe, who also inspired me to make this portfolio story-based). This exercise in turn was based on a staircase art installation at the Oodi Central Library in Helsinki. We planned to send the card deck home with our project partners for them to use as a tool within their own internal brainstorming sessions.
When it came time to decide who would facilitate the session, I volunteered even though I was a little intimidated at the prospect of leading experienced design professionals through our little workshop. But I wanted to challenge myself and get some facilitation experience under my belt, and I was really looking forward to this share out because I knew that sitting down and chatting with our project partners would lead to a burst of new ideas, insights and action items for our studio. Sure enough, the session went well overall, and helped us understand what types of designs our project partners were hoping to get from this collaboration. We also got positive feedback from them on receiving a new tool they can use to better place themselves in the shoes of—and thus better design for—the myriad different people visiting the AIC every day.
This experience further impressed on me that presentations and even simple share outs are experiences to be designed—you have to consider who you are presenting to and what they are looking to get from it, and that will guide how you structure the content and share out the information afterward. This is something I think about with every deliverable I create now, and hopefully you’ve noticed how it’s influenced the structure of this website…


Two
While I was interning at VivaQuant, I had the chance to work on almost every stage of assembly for the RX-1 mini by the time I finished working there, and I learned a ton. Near the end of the second summer, I was tasked by my supervisor with reverse engineering a prototype of a new accessory and writing up assembly instructions for our operators.
At that point I’d had the chance to work on a few SOPs (standard operating procedures) to ensure they matched our current assembly process, including all of the incremental improvements we’d made to materials, tools and assembly sequences since the last SOP updates. For this task though, I got to start from scratch, which was awesome. I asked a lot of questions—both of the engineer who designed the prototype and of my supervisor—but finished it relatively quickly and enjoyed every second of it!
Three
I had the pleasure of taking an intro to sketching course last year, which gave me some great basic skills for communicating form and function for mockups (see photos for some examples!)
For our final project, we had the opportunity to either combine skills we’d practiced for previous classes (sketching a variety of different hard materials including wood, glass, plastic and metal), or to design a set of soft bags, practicing soft material sketching skills we’d learned during our last class and hadn’t had time to nail down yet. Though it was a slightly riskier choice, I really liked the second idea and produced the following set of bags for my final.


Four
For my computer integrated manufacturing class, we had the chance to design a little figure using NX, then use NX’s CAM software and our shop’s CNC machining center to mill out our molds. We then used those to injection mold our part.
In the early stages of the course, we decided to design a little alien figurine, and I, wanting to challenge myself, came up with my own design for the little character using lots of custom splines and surface modeling. The alien was meant to double as a slingshot, and so I focused on making sure that the design could be held comfortably in one hand and stand on its own (see first photo for reference).
When I presented it to my group, however, they pointed out that due to its complex geometry, it would be harder to make quick adjustments down the line (we used a press fit to keep the two halves together), and indeed, this was the case. Ultimately, we went with another team member’s more straightforward model, which turned out to be a lot easier to edit later on when we ran into some issues translating our CAD to CAM in NX.
One of many design-for-manufacturing tidbits I tucked away from this course: although complex geometry is sometimes needed in a CAD model to ensure user comfort in handling the end product, it’s important to ensure that geometry is as simple as possible and mirrored to ensure dimensional changes are reflected across the whole part.

Five
One of my major’s required courses was for white space product design, where my team and I identified a need for a more effective travel jewelry case. Our group came up with a really cool design which required several individual 3D printed inserts to be covered with a memory foam material and another layer of adhesive velvet, for the jewelry to rest on during its transportation.
Before presenting our final prototype, I decided to take the extra time to hand stitch the inserts, because the machines we had at our shop could not handle sewing around 3D printed inserts with only a few millimeters of velvet material to hold onto. You can see one of said inserts here!
This took a while to do, but it made our final prototype significantly sturdier and gave it a much more cohesive look. Since part of our value proposition was a slightly higher materials cost for a much higher level of protection and a sophisticated aesthetic, I felt it was well worth the time!

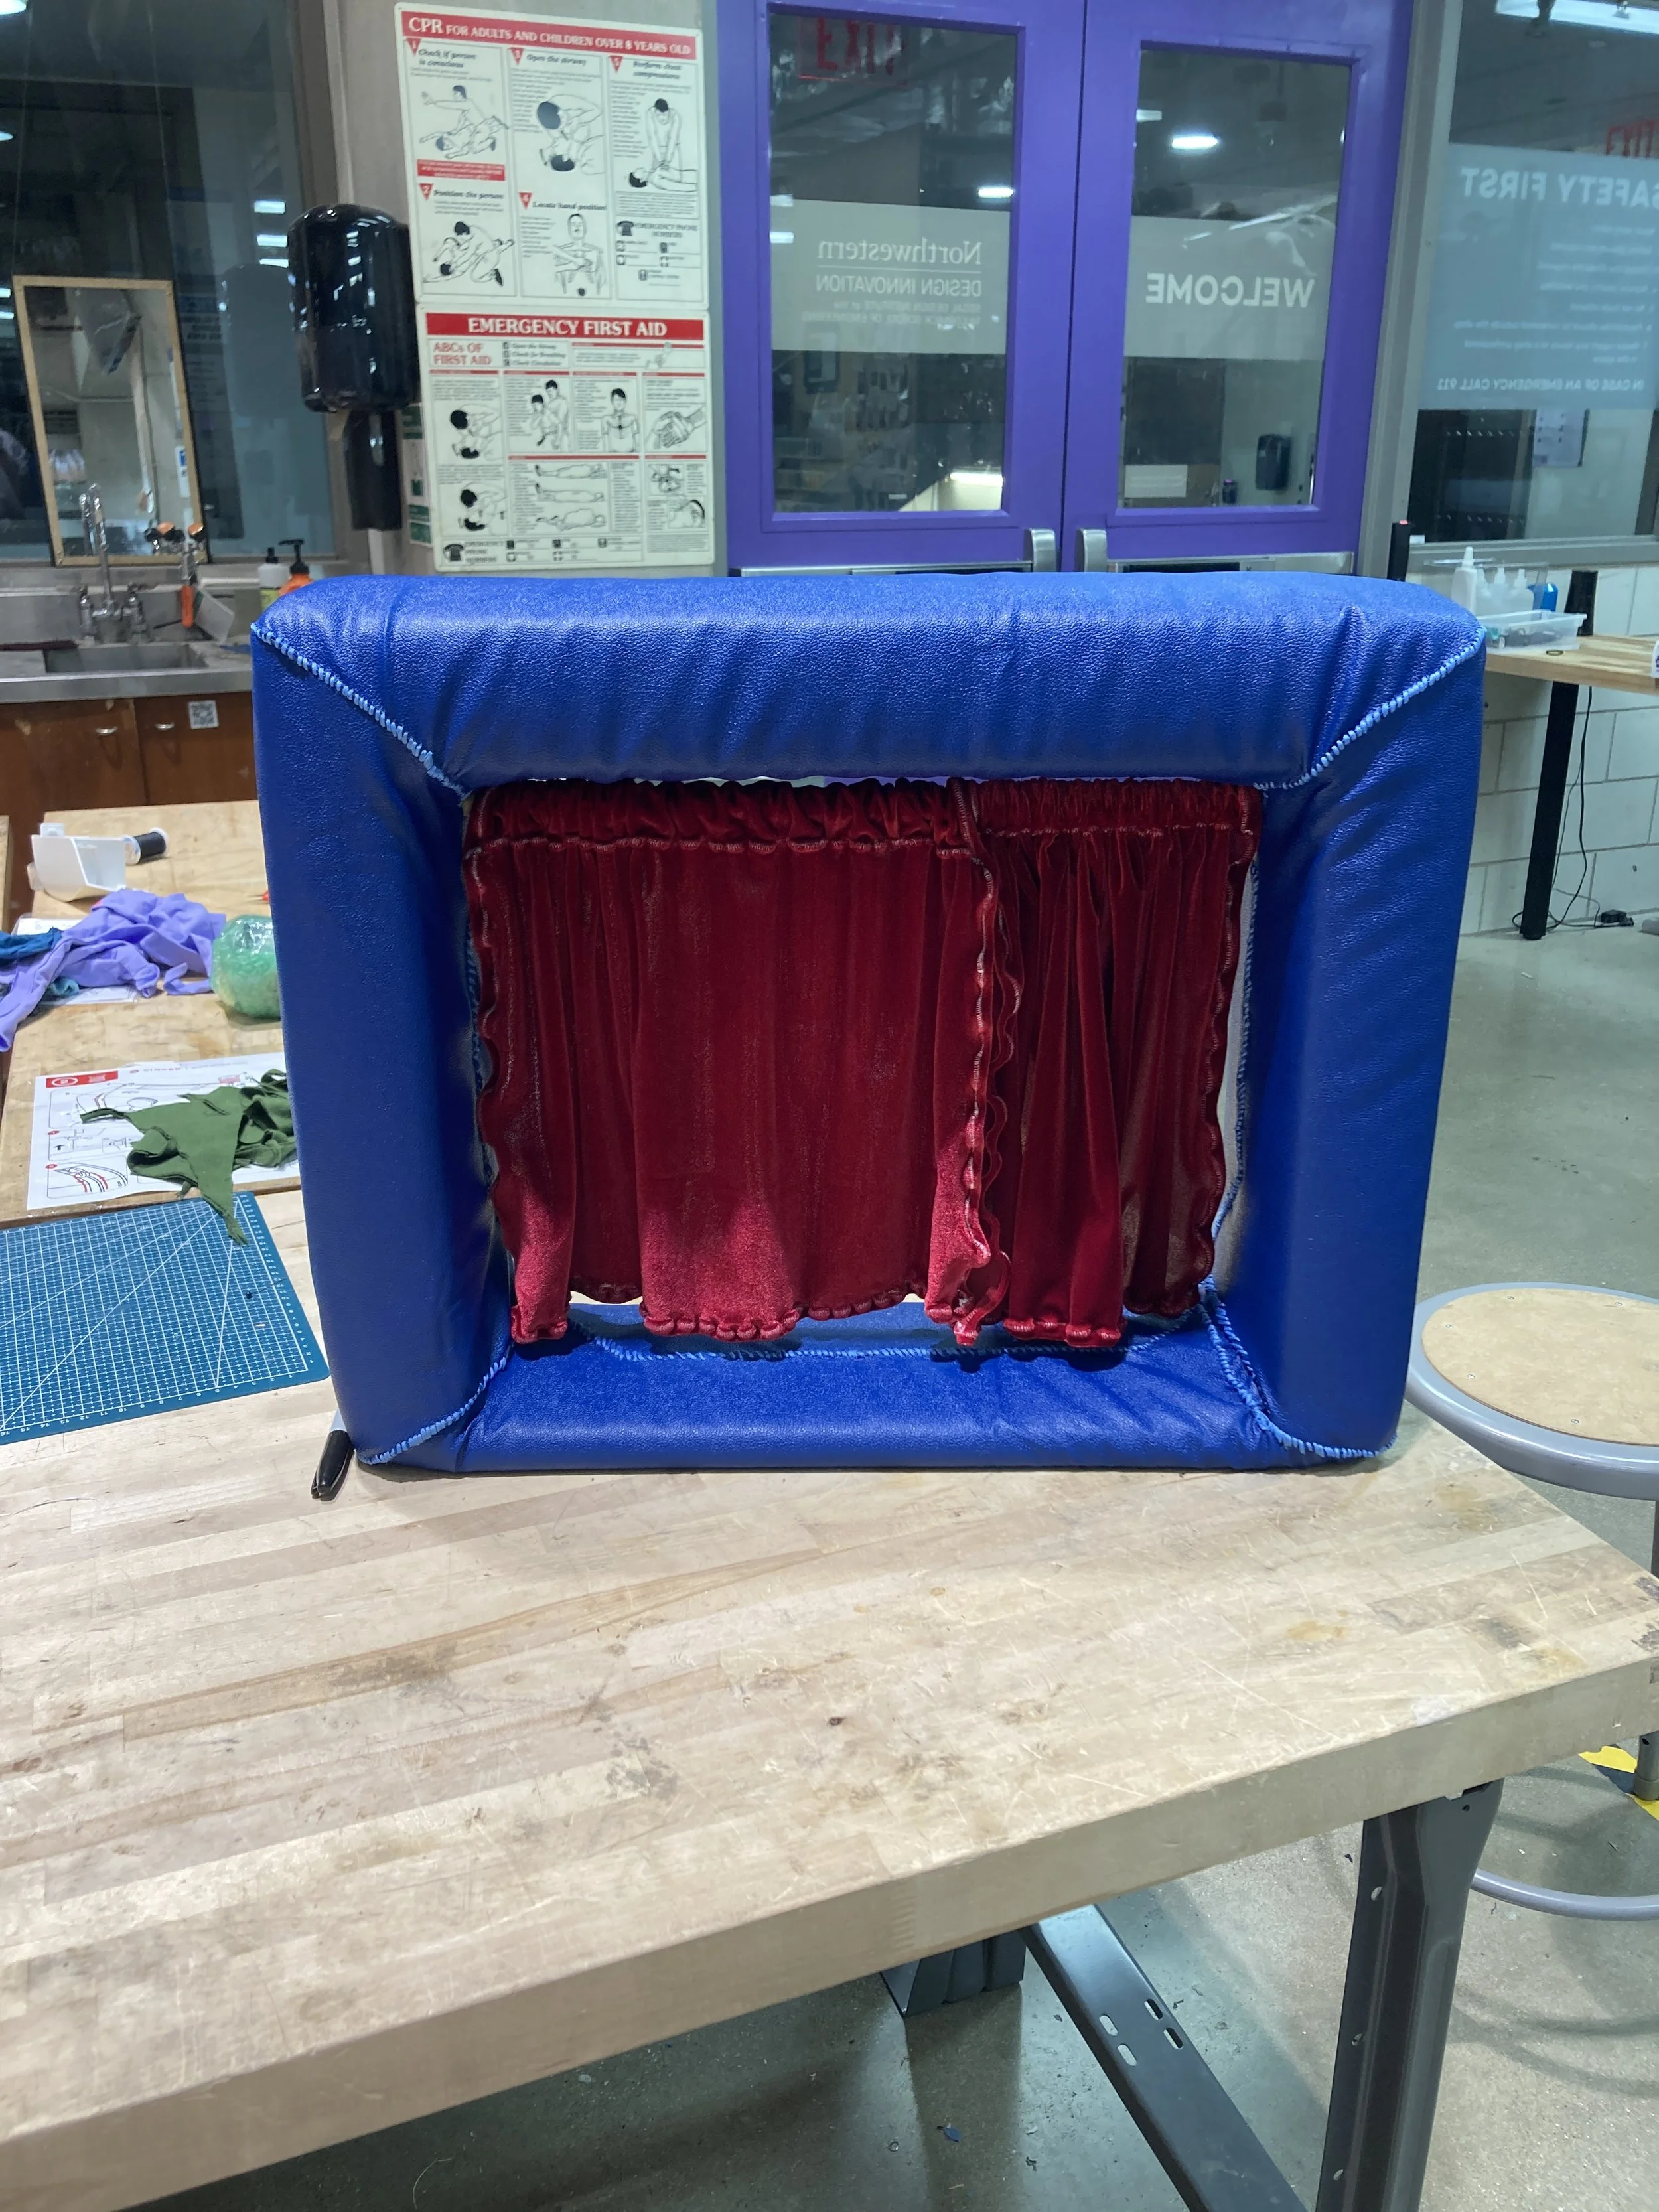
Six
In the same thread, for the puppet theater project I worked on during last summer’s Segal summer internship, I was the only person on our team with sewing experience, so although I hadn’t used a sewing machine in years, I jumped at the opportunity to own the theater curtains and the mini puppet theater module.
The curtains, made of a stretchy velvet material, took many tries to get right—even after carefully measuring and sewing test versions, I wasn’t happy with how well they held together. I knew these would be pulled back and forth many times a day for (hopefully) years, so I was determined to make sure they were as sturdy as I could possibly make them. I briefly explored another option that would encourage kids to pull on the curtain near the curtain rod (and thus reduce the wear on the curtain seams further down) but after more research, advice and test runs I landed on a method that ensured all the seams were secure, looked presentable from all sides of the play station, and would allow kids of any height to easily pull the curtains back and forth.
Similarly, the mini puppet theater was covered in lots of padding and then a blue leather covering, so it could be “press-fit” into the main theater module when not in use, and I was able to come up with a rough pattern for how to stitch the leather onto it, using a mini mockup of the module that myself or one of my teammates put together beforehand (I don’t remember which).
Because this module was designed to be squeezed into a tight cutout and removed often by kids (so they could bring it over to the big folks’ tables to do mini productions for their loved ones), I knew the seams where the leather came together would be under a lot of repeated stress, so we opted for heavy duty leather thread to stitch the design together. This task—with the module’s awkward geometry and the need for a smooth finished surface for an optimal fit into the larger play station—was no match for a sewing machine, so I did it by hand. This took many, many hours, required lots of patience and gave me tough fingertips, but the final product was indeed sturdy, and hopefully lasts a long time for the kids visiting their loved ones at the CCDOC.